Annapurna Circuit Trek (Partial Route): A Solo Journey Through High Passes

November 22–29 2025
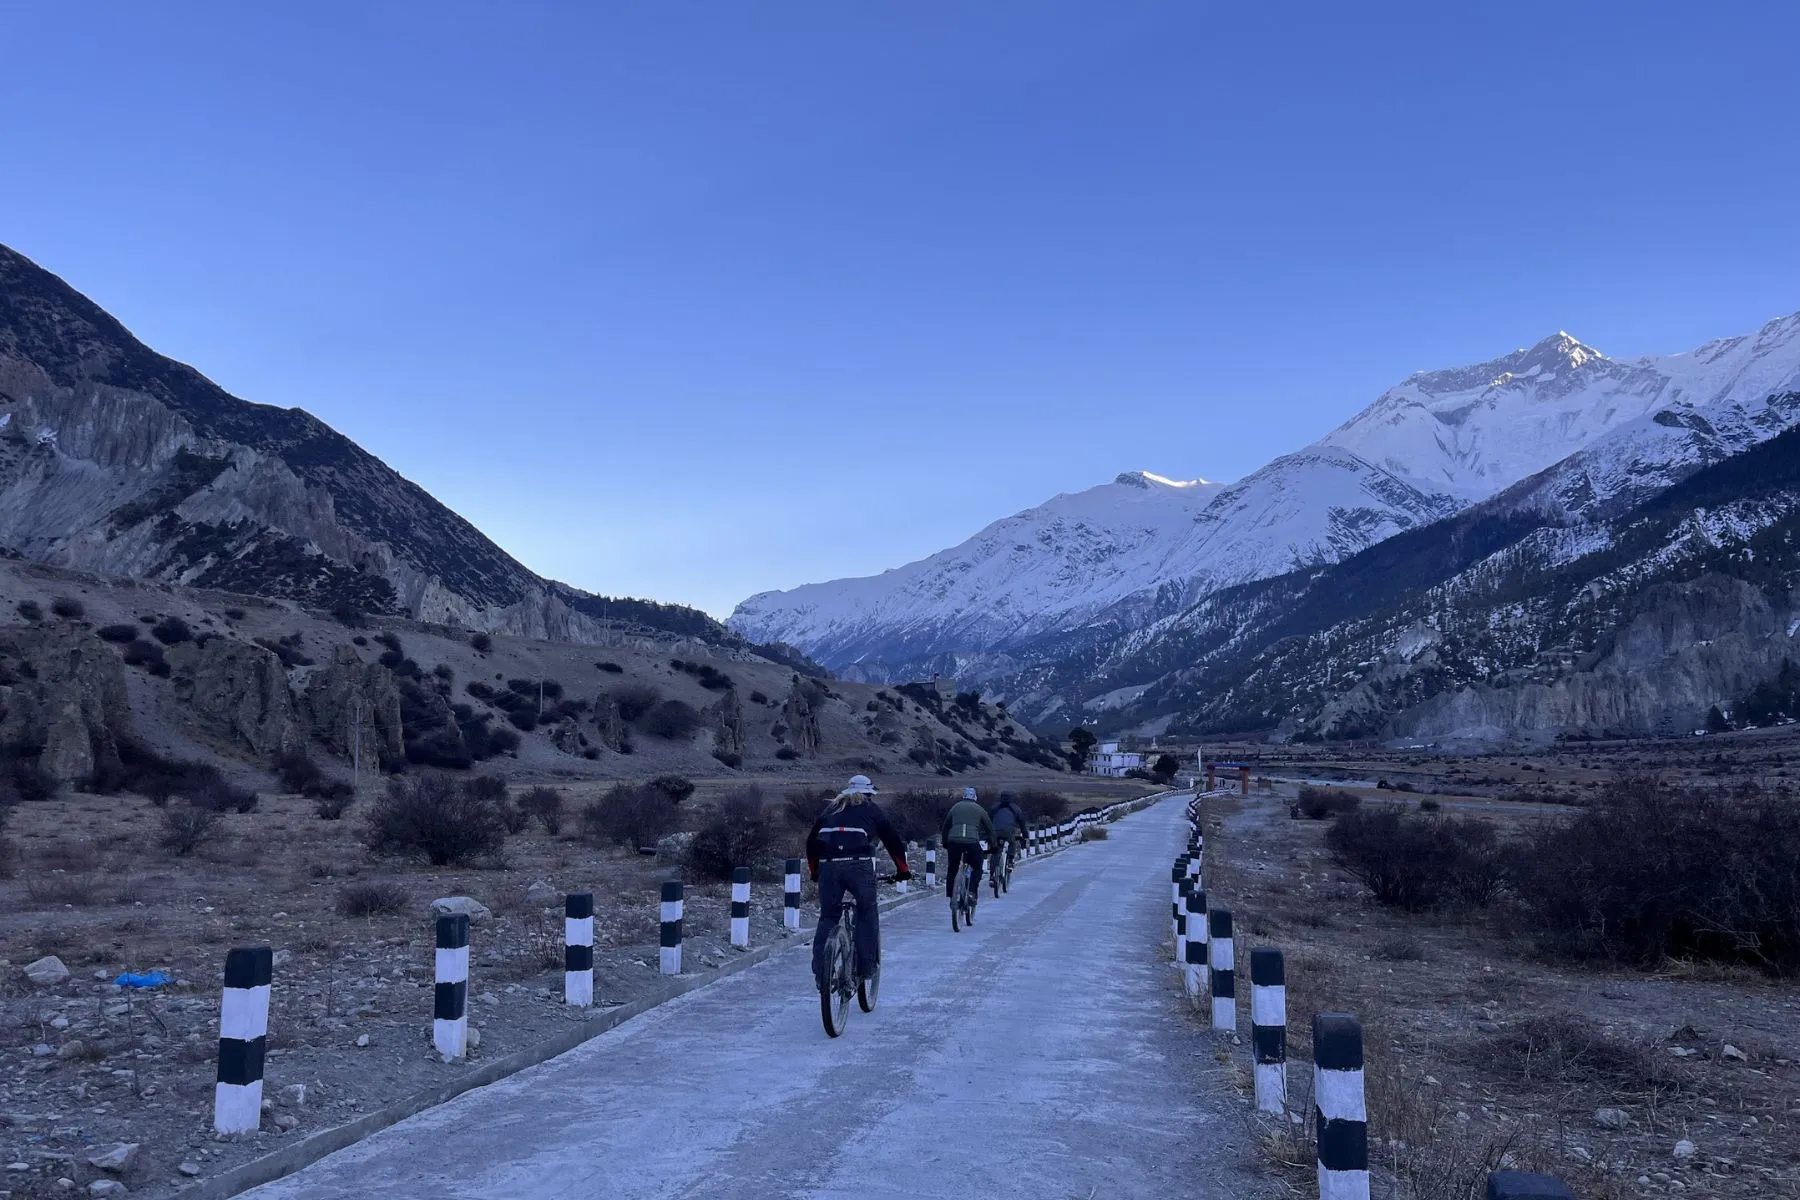
Embarking on the Annapurna Circuit does not always mean completing the entire loop from start to finish. In my case, time constraints led me to focus on the high-altitude heart of the circuit: Manang, Tilicho Lake, Thorong La Pass, and the descent to Muktinath.
This article is a concise and experience-based record of what I actually did: how I arranged permits as a solo trekker, navigated transportation challenges, managed acclimatization, dealt with difficult trail conditions, and what the journey realistically cost.
Overview
- Annapurna Circuit: full route vs partial trek
- Permits and Solo Trekking (Up-to-Date)
- Transportation: Expect the Unexpected
- Accommodation recommendations
- Acclimatization: Non-Negotiable
- Trail Safety: Extremely Slippery Conditions Toward Yak Kharka
- Health, Preparedness, and Trail Kindness
- Gear lessons from the trail
- High-Altitude Highlights
- Rough budget breakdown
Annapurna Circuit: Full Route vs My Approach
The Annapurna Circuit is traditionally completed over 18–21 days, looping from Besisahar to Pokhara via Thorong La Pass (5,416 m). Many itineraries include side trips such as Ice Lake or Tilicho Lake, followed by a gradual descent through Mustang and the Kali Gandaki Valley.
I chose to do a partial route, focusing on:
- Manang and proper acclimatization
- Tilicho Lake
- Thorong La Pass
- Muktinath
This approach allowed me to still experience arguably the most demanding and rewarding sections of the circuit without committing to the full loop, as I could not afford longer trekking days.
Permits and Solo Trekking (Up-to-Date)
I started the trek from Pokhara. It’s possible as well to start from Kathmandu. The most important thing is to reach Besisahar area.
For this trek, I obtained my Annapurna Conservation Area Permit (ACAP) online. Although it’s possible to get it offline, by coming to this office in Pokhara. The office is located close to the Toursit Bus Park, where you can buy the bus ticket to Besisahar, to make sure your seat is saved.
- Online permit system: https://epermit.ntnc.org.np/
- Cost: NPR 3,000
- Permit validity: single entry, date-specific
- Must be carried with passport at all times
The permit was checked multiple times along the route.
Total walking distance: ~113 km
Maximum altitude reached: 5,416 m
Steps recorded: ~170,000
Below is my itineraty:
| Date | Activity |
|---|---|
| 22/11 | Bus Pokhara → Besisahar, shared jeep to Chame |
| 23/11 | Chame → Manang (32 km) |
| 24/11 | Acclimatization hikes around Manang (10 km) |
| 25/11 | Manang → Tilicho Base Camp (15 Km) |
| 26/11 | Tilicho BC → Tilicho Lake → Yak Kharka (30,5 Km) |
| 27/11 | Yak Kharka → Thorong Phedi (7,5 Km) |
| 28/11 | Thorong Phedi → Thorong La → Muktinath (15,3 Km) |
| 29/11 | Van Muktinath → Pokhara |
Transportation: Expect the Unexpected
The journey toward the Annapurna Circuit began with a bus ride from Pokhara to Besisahar, the main gateway to the northern section of the circuit.
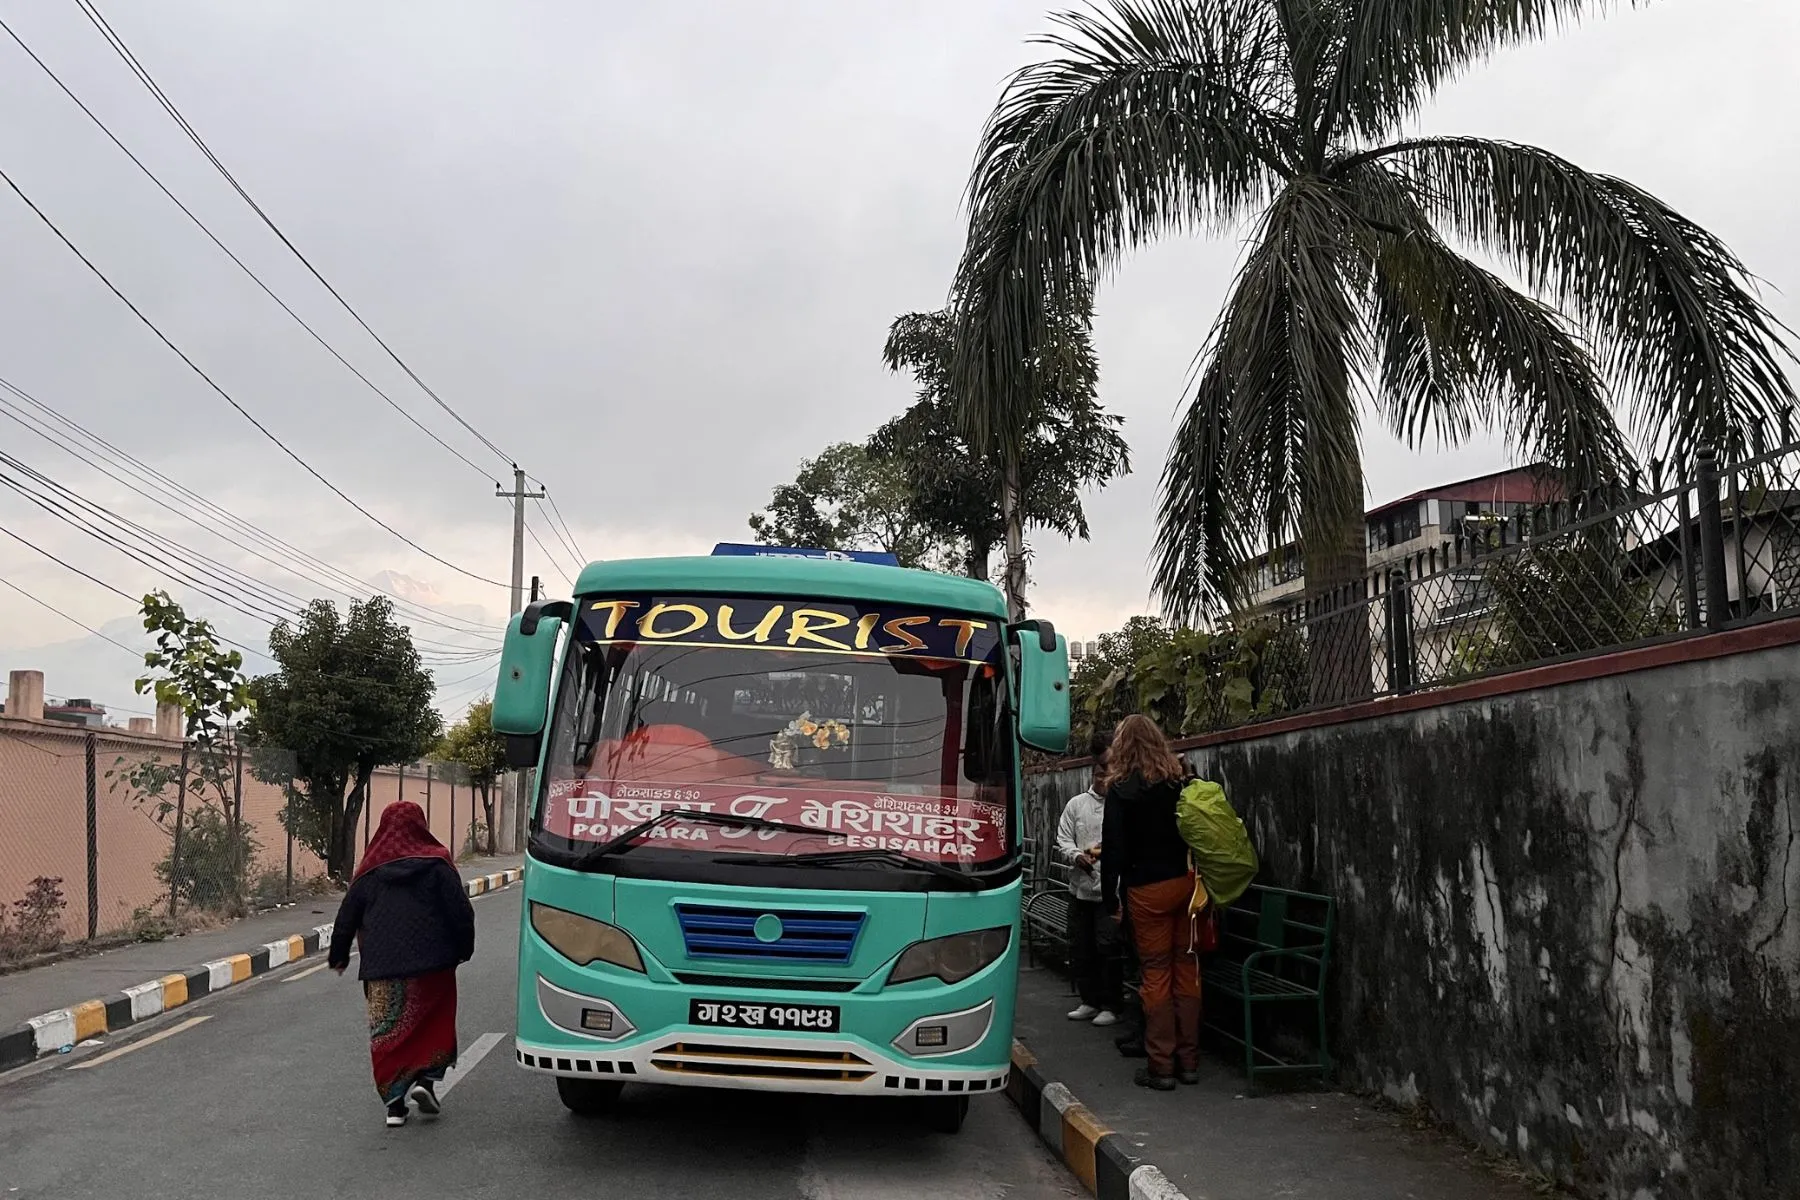
As a solo traveller, I made a conscious effort to ask around at the bus station and talk to other trekkers about their plans. By doing so, I found four other trekkers who were also planning to start their trek from Chame. Having clarity on our shared destination made the next step easier.
At Besisahar, several jeep owners were already waiting for passengers heading further north. Always try to negotiate witht the offers. By sharing the jeep with five people in total, we managed to secure a reasonable rate.
- Shared jeep cost: NPR 2,500 per person (Besisahar → Chame)
The jeep ride itself was long and physically demanding, but manageable given the road conditions. The real challenges, however, started earlier during the bus journey. Our bus broke down twice along the route, forcing us to stop unexpectedly and change vehicles mid-way. Each breakdown created confusion, especially when it came to moving luggage quickly and finding space on the replacement buses.
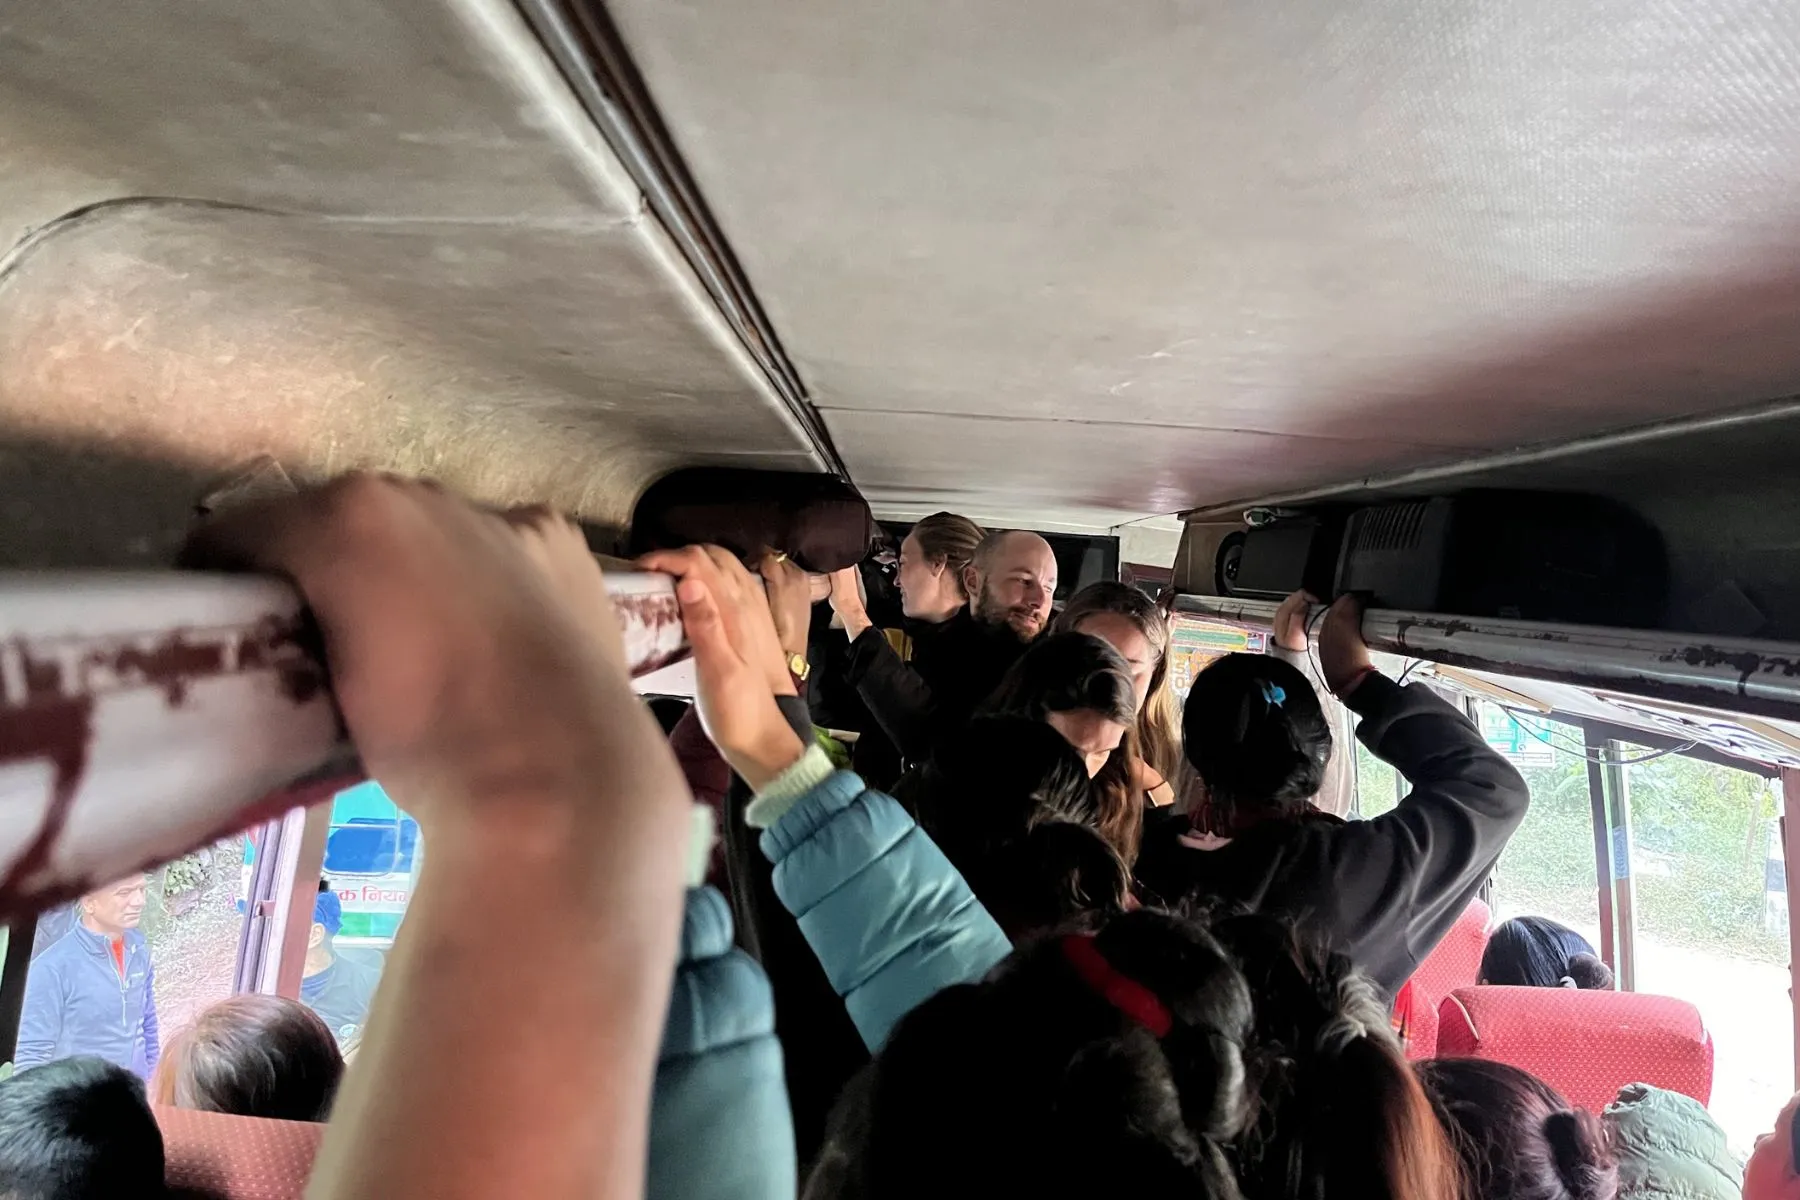
The final 20 kilometers were particularly chaotic. With limited transportation options available, we boarded an already overcrowded local bus. There were not many seats left, and most passengers had to stand the entire way alongside locals and supplies. Maintaining balance on rough mountain roads required constant attention.
This experience reinforced several important lessons for solo trekkers in Nepal:
- Always ask around information on the ground to complement your online research
- Do not accept the first price offered for jeep transport
- Be prepared for delays and sudden changes in transport
- Keep valuables and essential items on your body, not in loose bags
While uncomfortable and exhausting, these moments are part of traveling in remote regions of Nepal. Flexibility, patience, and a willingness to adapt quickly are just as important as having a solid trekking plan.
Accommodation Recommendations
One of the practical advantages of trekking on the Annapurna Circuit (and generally in other treks in Nepal) is the availability of accommodation along most sections of the trail. The route is supported by a well-established tea house system, consisting of lodges and small hotels that provide rooms and meals for trekkers. While standards vary depending on altitude and location, these accommodations make it possible to trek without carrying camping equipment.
Accommodation along the circuit ranges from relatively comfortable lodges at lower elevations to very basic rooms at higher altitudes. As elevation increases, expectations need to adjust accordingly — warmth, shelter, and food become far more important than comfort or amenities. At higher villages, most social activity takes place in the dining area where heating is available.
Before the trek, I spent time reading recent experiences shared by other trekkers in the Facebook group
These posts provided useful, up-to-date insights into accommodation conditions, seasonal crowd levels, and which places were operating at the time. Combined with mapping potential overnight stops based on distance and elevation gain, this helped me plan each day realistically while still remaining flexible.
Based on comfort, location, and overall experience during my trek, the following accommodations stood out:
Chame:
Eagle Eye Hotel
A solid option after the long journey from Besisahar. The rooms were warm, the food was reliable, and it offered a good place to recover before continuing higher into the mountains.Manang:
Mountain Lake Resort
Manang is a key acclimatization stop, and staying somewhere comfortable made a noticeable difference. The lodge provided a quiet environment and a dining area where many trekkers gathered in the evenings, which also made it easy to exchange information about trail conditions ahead.Yak Kharka:
Thorong Peak Hotel
At this altitude, accommodation becomes more basic. This lodge offered sufficient shelter, warm meals, and a communal dining area, which was essential after trekking through cold and icy conditions.Thorong Phedi:
New Hill Top Restaurant
This is a strategic stop before crossing Thorong La Pass. The facilities are simple, but the location is ideal for an early start.Muktinath:
Hotel Holy Land
After crossing Thorong La, arriving in Muktinath feels like reaching a transition point between trekking and road travel. This hotel provided a comfortable place to rest, proper meals, and assistance in arranging transport back to Pokhara.
Regarding Tilicho Base Camp, I did not have a pleasant experience with accommodation there. Service and overall conditions were below expectations, and I cannot recommend a specific lodge. Accommodation quality at Tilicho Base Camp can vary significantly, and it is advisable to manage expectations and be prepared for limited options.
Overall, accommodation on the Annapurna Circuit allows trekkers to plan daily stages with a reasonable degree of confidence. By combining recent reports from other trekkers, basic route mapping, and on-the-ground flexibility, it is possible to find suitable places to stay even during busier periods, without needing advance reservations in most cases.
Acclimatization: Non-Negotiable
Manang serves as the primary acclimatization hub on the Annapurna Circuit, and for good reason. Located at approximately 3,500 meters above sea level, it marks the point where many trekkers first spend extended time at a significant altitude. From here onward, elevation gains become more pronounced, and the margin for error narrows.
Scientific and medical trekking guidelines consistently emphasize that altitude-related illnesses are caused by lack of acclimatization, not lack of fitness. Even well-trained hikers can experience symptoms of Acute Mountain Sickness (AMS) if ascent is too rapid. Widely accepted principles in high-altitude medicine include:
- Above 3,000 meters, sleeping altitude should increase by no more than 300–500 meters per day
- A rest or acclimatization day every 3–4 days is strongly recommended
Acclimatization works through gradual physiological adaptation. As altitude increases, the body responds by:
- Increasing breathing rate to improve oxygen uptake
- Producing more red blood cells to transport oxygen
- Adjusting blood chemistry and fluid balance over time
These changes require time, not effort. Moving higher too quickly does not accelerate adaptation and often results in headaches, nausea, loss of appetite, poor sleep, or more serious symptoms.
Recognizing this, I spent a full day in Manang focused on active acclimatization rather than complete rest. The goal was to apply the principle of “climb high, sleep low”, by exposing the body to higher altitude during the day while returning to the same sleeping elevation at night.
During this day, I did several short, low-intensity hikes to:
- Praken Gompa, offering gentle elevation gain and cultural context
- Praken Viewpoint, which provides a higher vantage point without prolonged exertion
- Gangapurna Lake, an easy walk that still promotes circulation and movement
- A local monastery, combining light activity with rest and reflection
These hikes were intentionally slow and unhurried. The objective was not distance or speed, but gradual exposure and careful observation of how my body responded to altitude.
Acclimatization and the Tilicho Lake Detour
Tilicho Lake is a high-altitude glacial lake in the Annapurna range of the Himalayas, known as one of the highest lakes in the world. It is located in the Manang District of north-central Nepal and stands at an elevation of approximately 4,919 meters. This acclimatization day became even more important when considering the route toward Tilicho Lake. In recent years, many trekkers choose to take a jeep or private vehicle from Manang to Khangsar village, starting their walk only from there. While this approach reduces walking distance, it also compresses acclimatization time.
During my trek, I met several trekkers who followed this strategy. Some of them were able to reach Tilicho Base Camp but could not continue to Tilicho Lake itself. The reasons varied:
- Fatigue combined with altitude effects
- Poor trail conditions (ice, exposure, landslides)
- Weather changes and safety concerns
This reinforced an important point: using vehicles to gain elevation does not reduce the physiological stress on the body. Even if the legs feel fresh, the body may not yet be adapted to the altitude.
For those heading toward Tilicho Lake, especially via Khangsar, proper acclimatization in Manang becomes even more critical. Skipping or shortening this phase increases the likelihood of needing to turn back — not because of lack of strength, but because the body has not had sufficient time to adjust.
The benefit of my acclimatization day became clear in the following days. Moving from Manang toward Tilicho Base Camp and later Thorong La Pass felt noticeably more manageable. Breathing was steadier, sleep quality improved, and energy levels were more consistent compared to earlier days of ascent.
It is important to note that acclimatization is highly individual. Some trekkers adapt quickly, while others experience symptoms at lower elevations. Factors such as genetics, hydration, sleep quality, previous altitude exposure, and recent illness all play a role.
For this reason, acclimatization should never be rushed to meet a fixed schedule. In high-altitude trekking, adjusting plans based on how your body feels is not a sign of weaknes. It rather is a critical safety decision. On the Annapurna Circuit, taking acclimatization seriously can be the difference between safely reaching Thorong La and having to turn back earlier than planned.
Trail Safety: Extremely Slippery Conditions Toward Yak Kharka
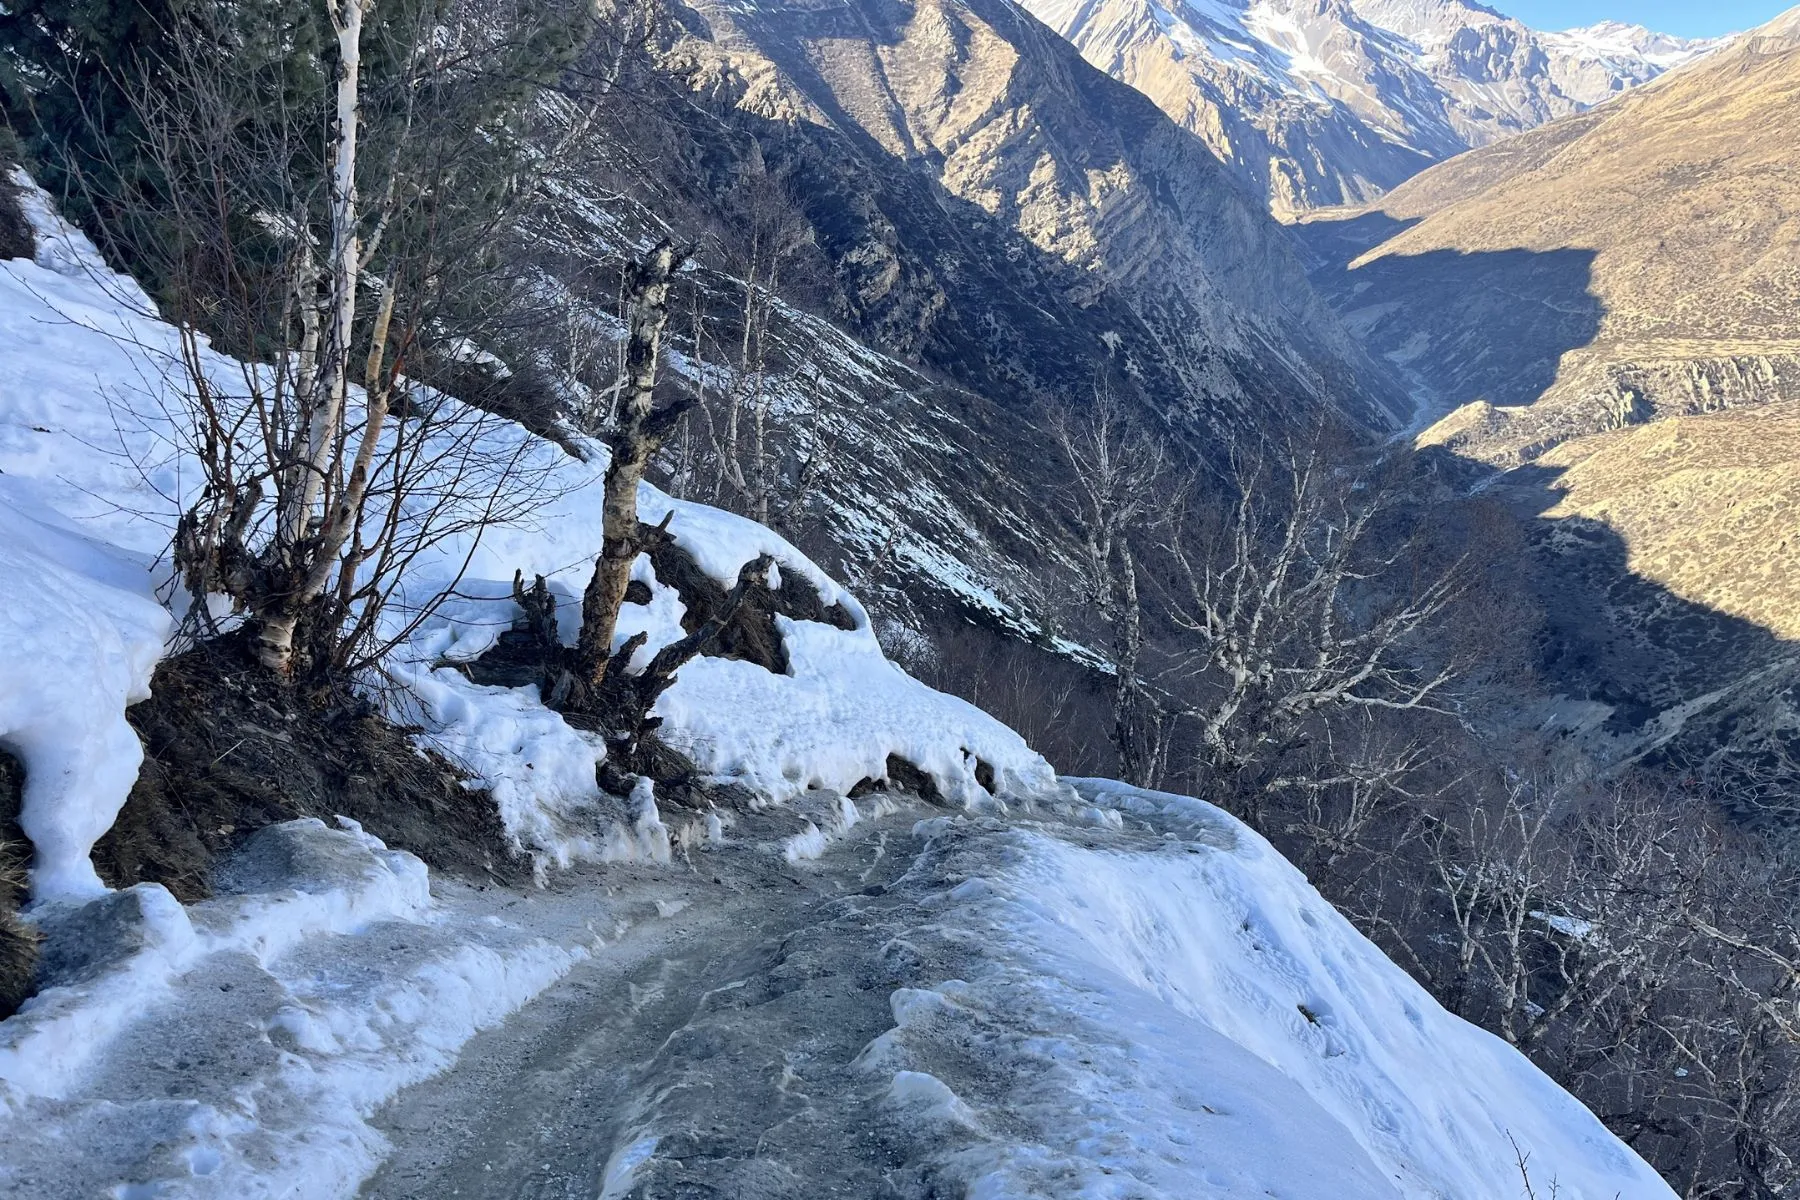
The section leading to Yak Kharka was one of the most hazardous parts of the trek due to trail conditions, not altitude alone. Large portions of the path were covered in compacted ice, frozen mud, and hard-packed snow.
Even with microspikes, the trail remained extremely slippery. In many places, the path was narrow, uneven, and slanted toward steep drops. A fall here could result in serious injury.
Microspikes provided additional grip, but they did not eliminate the risk. Progress was slow and required constant concentration. Trekking poles were essential for balance, and careful foot placement mattered more than speed.
A Note on My Decision and Why It Was Not Ideal
It is important to add context to this section. My decision-making on this day was heavily influenced by time constraints. I was trekking fast overall and did not have many buffer days available. Because of this, I chose to continue all the way from Tilicho Base Camp toward Yak Kharka in a single day.
Under normal circumstances, most trekkers break this section by stopping at Shree Kharka after returning from Tilicho Base Camp. This allows for:
- Shorter daily distance
- More recovery time
- Reduced exposure to fatigue on slippery terrain
By skipping this stop, I ended up doing a very long and demanding day, a choice that, in hindsight, I would not generally recommend. Fatigue combined with icy trail conditions significantly increased the risk. Even with proper gear, tired legs and reduced concentration can quickly turn a manageable trail into a dangerous one.
While I managed to complete the section safely, this was largely due to moving slowly, taking frequent pauses, and being extremely cautious. For trekkers with more time, breaking the route at Shree Kharka is the far safer and more sensible option, especially when trail conditions are icy or unstable.
This experience reinforced an important lesson: on high-altitude treks, efficiency should never come at the expense of safety. Having extra days is not a luxury. But it is a critical risk-management tool.
Health, Preparedness, and Trail Kindness
After the long and demanding day continuing past Tilicho Base Camp toward Yak Kharka, the physical strain began to show. Fatigue from extended walking, combined with cold temperatures and thin air, left my body more vulnerable than expected. That night in Yak Kharka, I developed a severe cold accompanied by persistent coughing.
While I carried basic medication, I realized that my preparation was incomplete. I did not have throat lozenges, which would have helped manage the coughing and discomfort, especially at night when cold air and dry conditions made symptoms worse.
The following morning, a fellow hiker from Korea noticed my condition and took the time to check on me, making sure I was okay before starting his own trek. He offered simple medication from his own supplies. It was a small act, but in a remote, high-altitude environment, such gestures carry significant weight.
This experience reinforced several important lessons about health and preparedness on the trail:
- Carry a complete set of cold and flu medication
- Include throat lozenges for dry air and persistent coughing
- Bring supplements and electrolytes to support recovery
- Do not underestimate the impact of fatigue and cold exposure
At altitude, even minor health issues can escalate quickly when combined with exhaustion and environmental stress. Proper preparation reduces risk, but awareness and mutual care among trekkers often make the critical difference when things do not go as planned.
Gear Lessons from the Trail
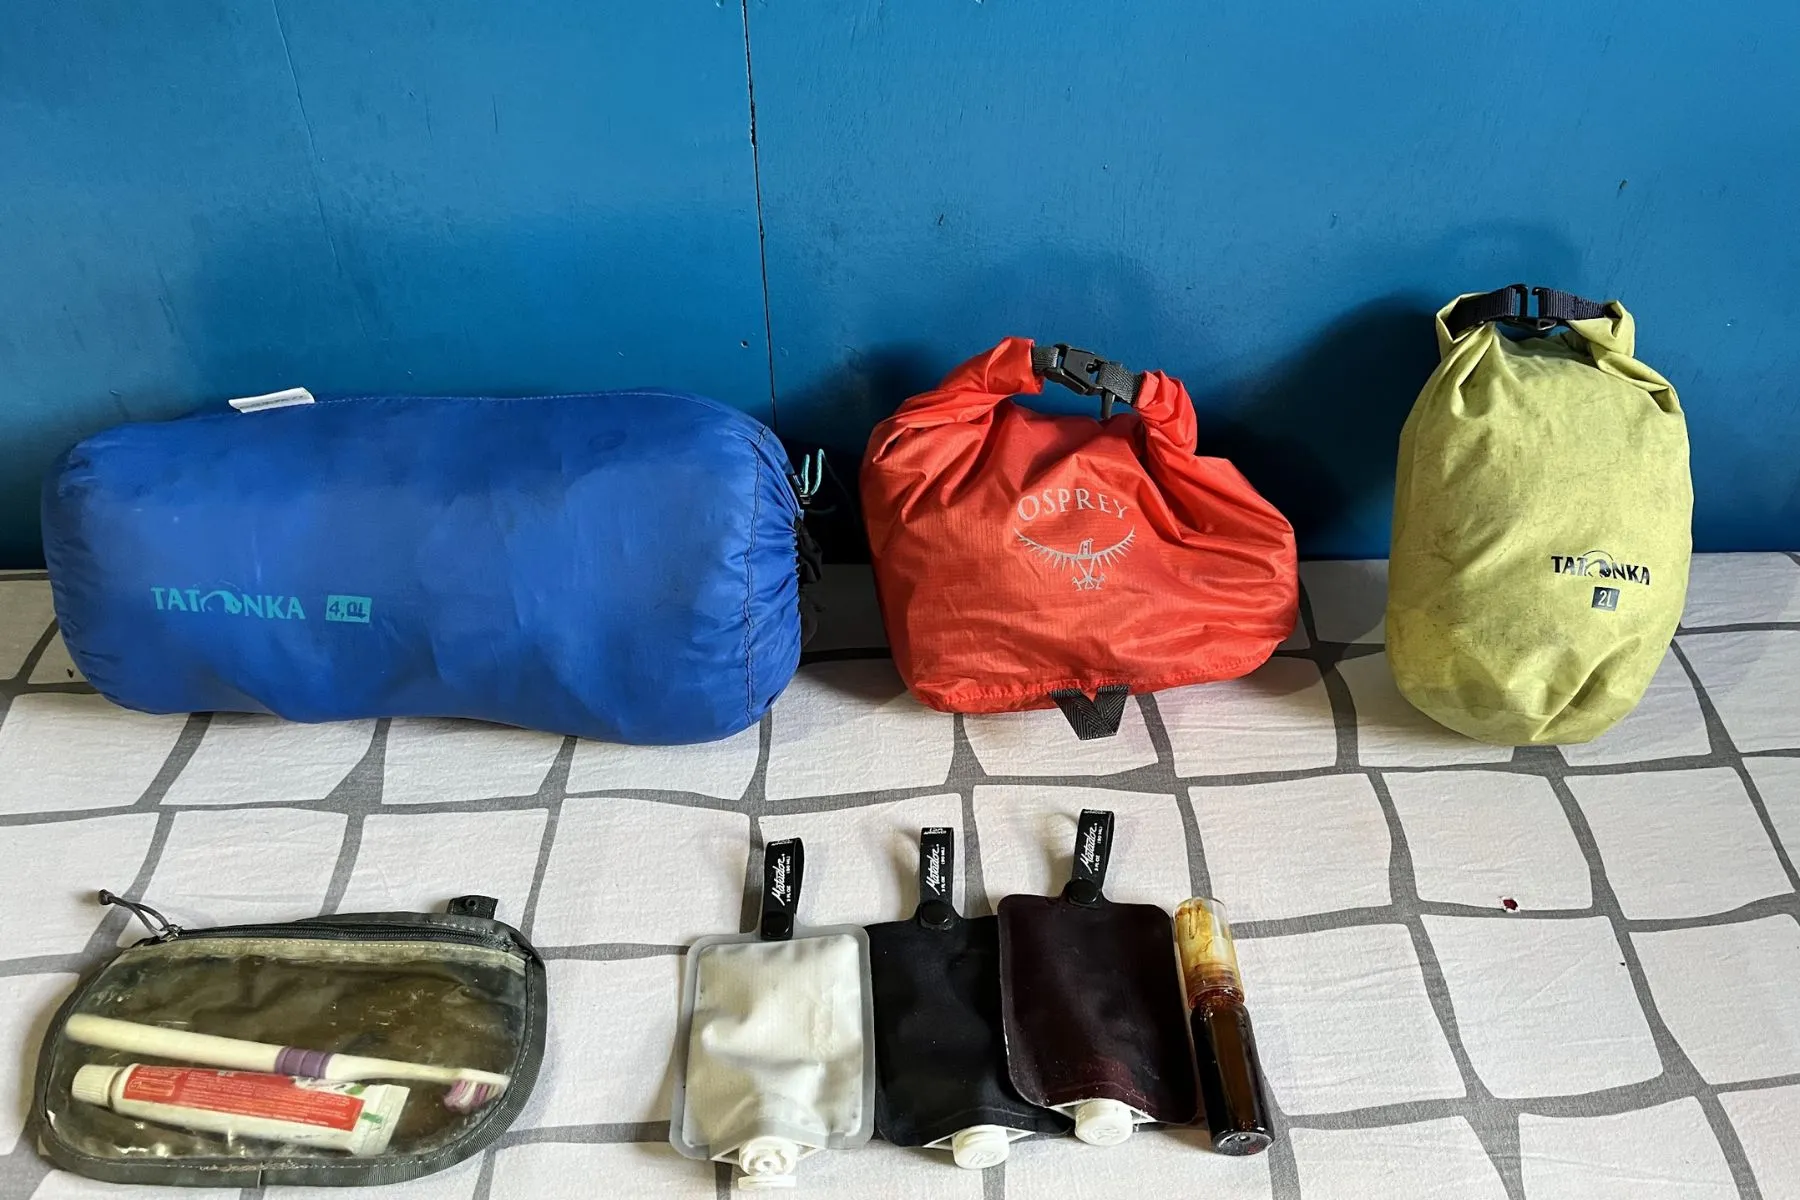
Gear choices become increasingly important the higher you go, especially when conditions are cold, windy, and unpredictable. While my overall packing list worked well, the trail highlighted a few items that proved essential, and a few that I underestimated.
Trekking poles are essential
I lost my trekking poles during a bus change and had to walk from Chame to Manang without them. While manageable on that section, the difference became very clear once the trail turned icy and steep. I replaced them in Manang for NPR 1,500 (pair), and from that point on, they were indispensable, especially on slippery traverses and long descents where balance mattered more than speed.Insulated water flask
An insulated flask turned out to be one of the most useful items I carried. Being able to buy hot water from lodges before early morning starts made a noticeable difference, particularly on the Thorong La crossing. Warm water helped with hydration, comfort, and morale in freezing conditions.Neck gaiter
I was especially glad to have a neck gaiter. It provided versatile protection by keeping my neck warm, blocking cold wind, and helping retain heat during early starts and at higher elevations. It also doubled as face protection in windy and dusty sections.Beanie / warm headwear
A warm beanie proved essential, particularly in the evenings and early mornings when temperatures dropped sharply. Heat loss from the head is significant at altitude, and having proper head insulation improved overall comfort both on the trail and in unheated rooms.Gloves: thicker is better
One item I underestimated was gloves. I initially brought lightweight gloves intended for running. While they were adequate at lower elevations, they were insufficient in colder, wind-exposed sections near Thorong La. Thicker, insulated gloves would have provided better protection and comfort, especially during early morning starts and long descents.
This section of the trek reinforced an important principle: gear that feels optional at lower altitude often becomes critical higher up. Small items like gloves, headwear, and insulation can make a disproportionate difference to comfort, safety, and overall endurance in high-altitude environments.
High-Altitude Highlights
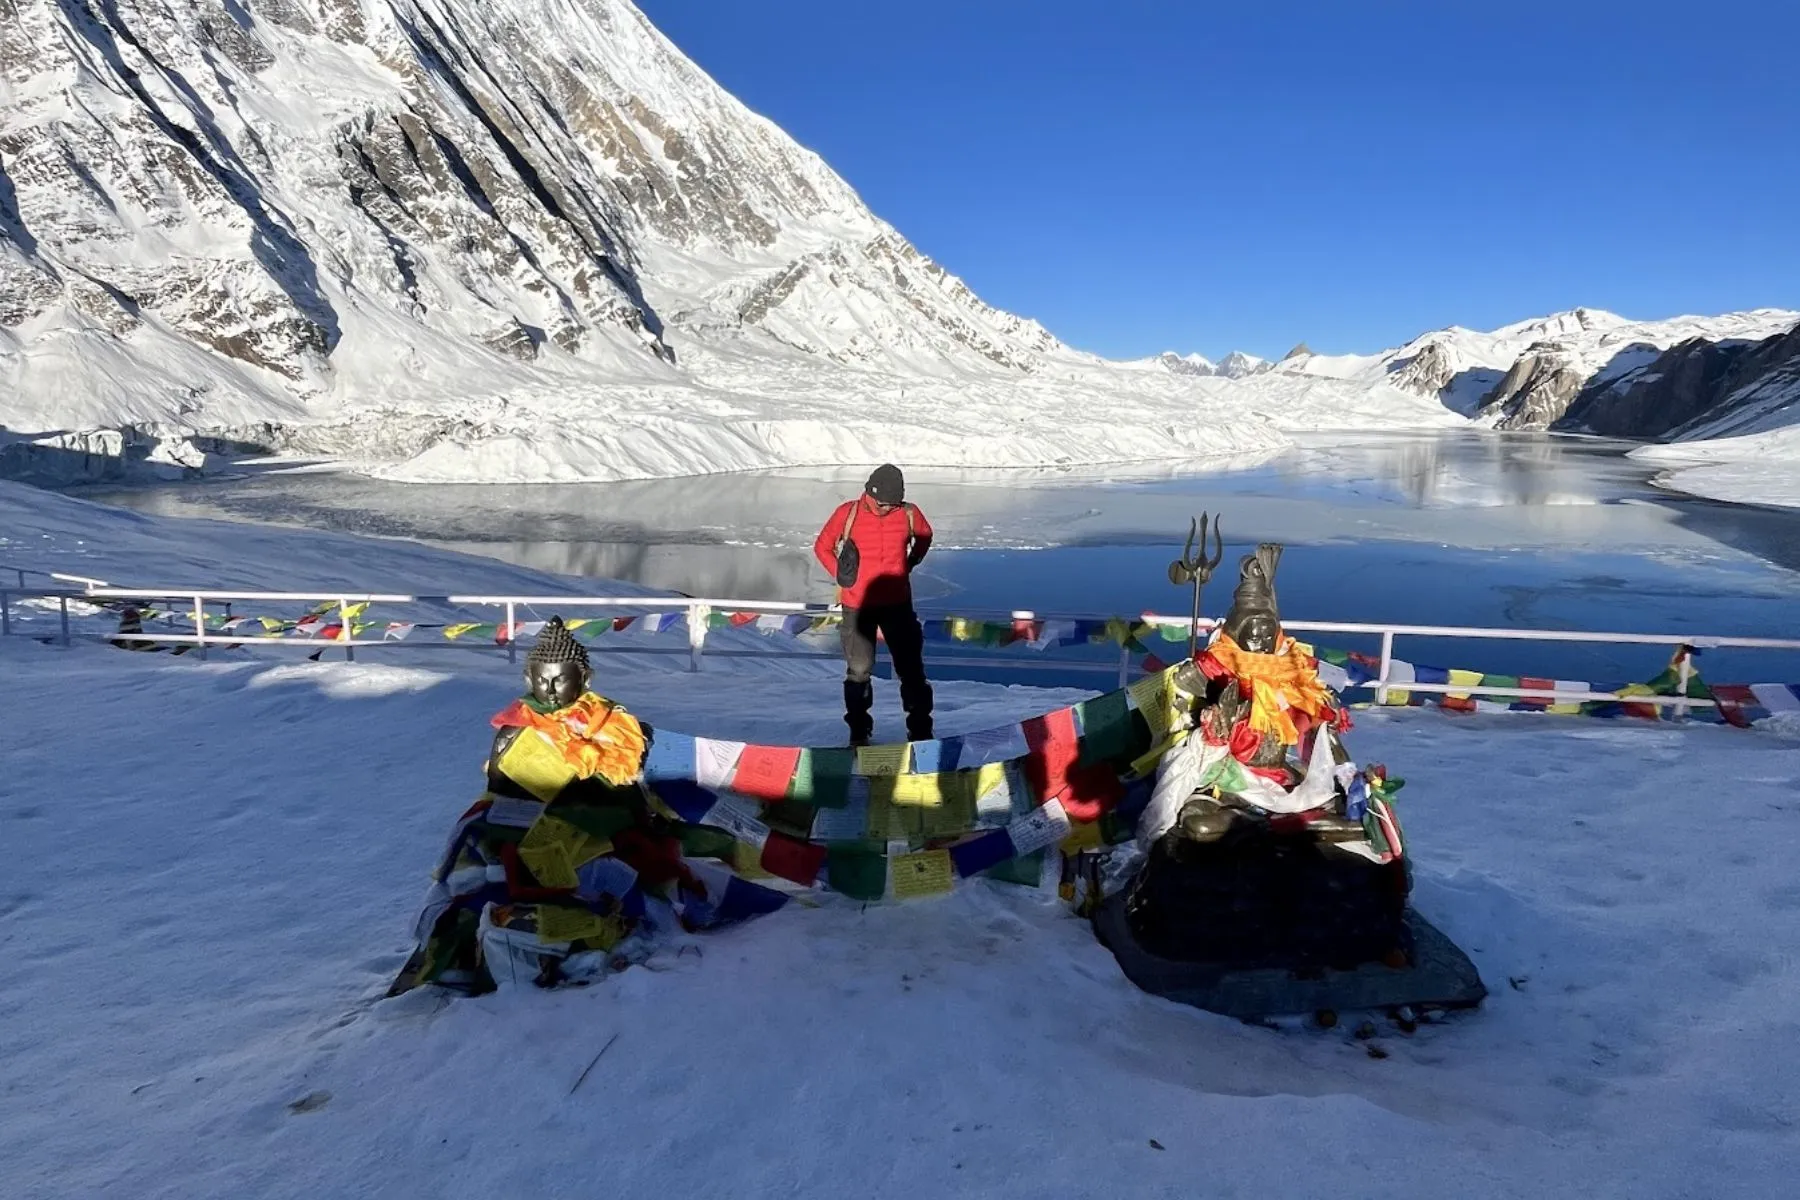
Tilicho Lake stands out as one of the most striking and demanding destinations on the trek. Not only because of its altitude, but also because of the conditions required to reach it. On the day I went to the lake, I started walking at around 4:00 a.m., long before sunrise. This early start was intentional, allowing me to take advantage of clearer morning weather and firmer trail conditions before wind and clouds typically build later in the day.
The approach to Tilicho Lake in the dark was cold and exposed. Temperatures were well below freezing, and the silence was broken only by footsteps on frozen ground. Breathing required steady pacing, and every movement felt deliberate. As daylight slowly revealed the surroundings, the lake appeared as a vast, stark expanse framed by barren slopes and snow-covered ridgelines. The remoteness of the area was unmistakable, no trees and little margin for error.
An often overlooked detail is that there is a small tea house near Tilicho Lake, where trekkers can buy hot tea or coffee. After hours of walking in freezing conditions, being able to warm up with a hot drink felt unexpectedly comforting. This is a good reason to carry enough cash, preferably in small bills, as prices increase with altitude and access.
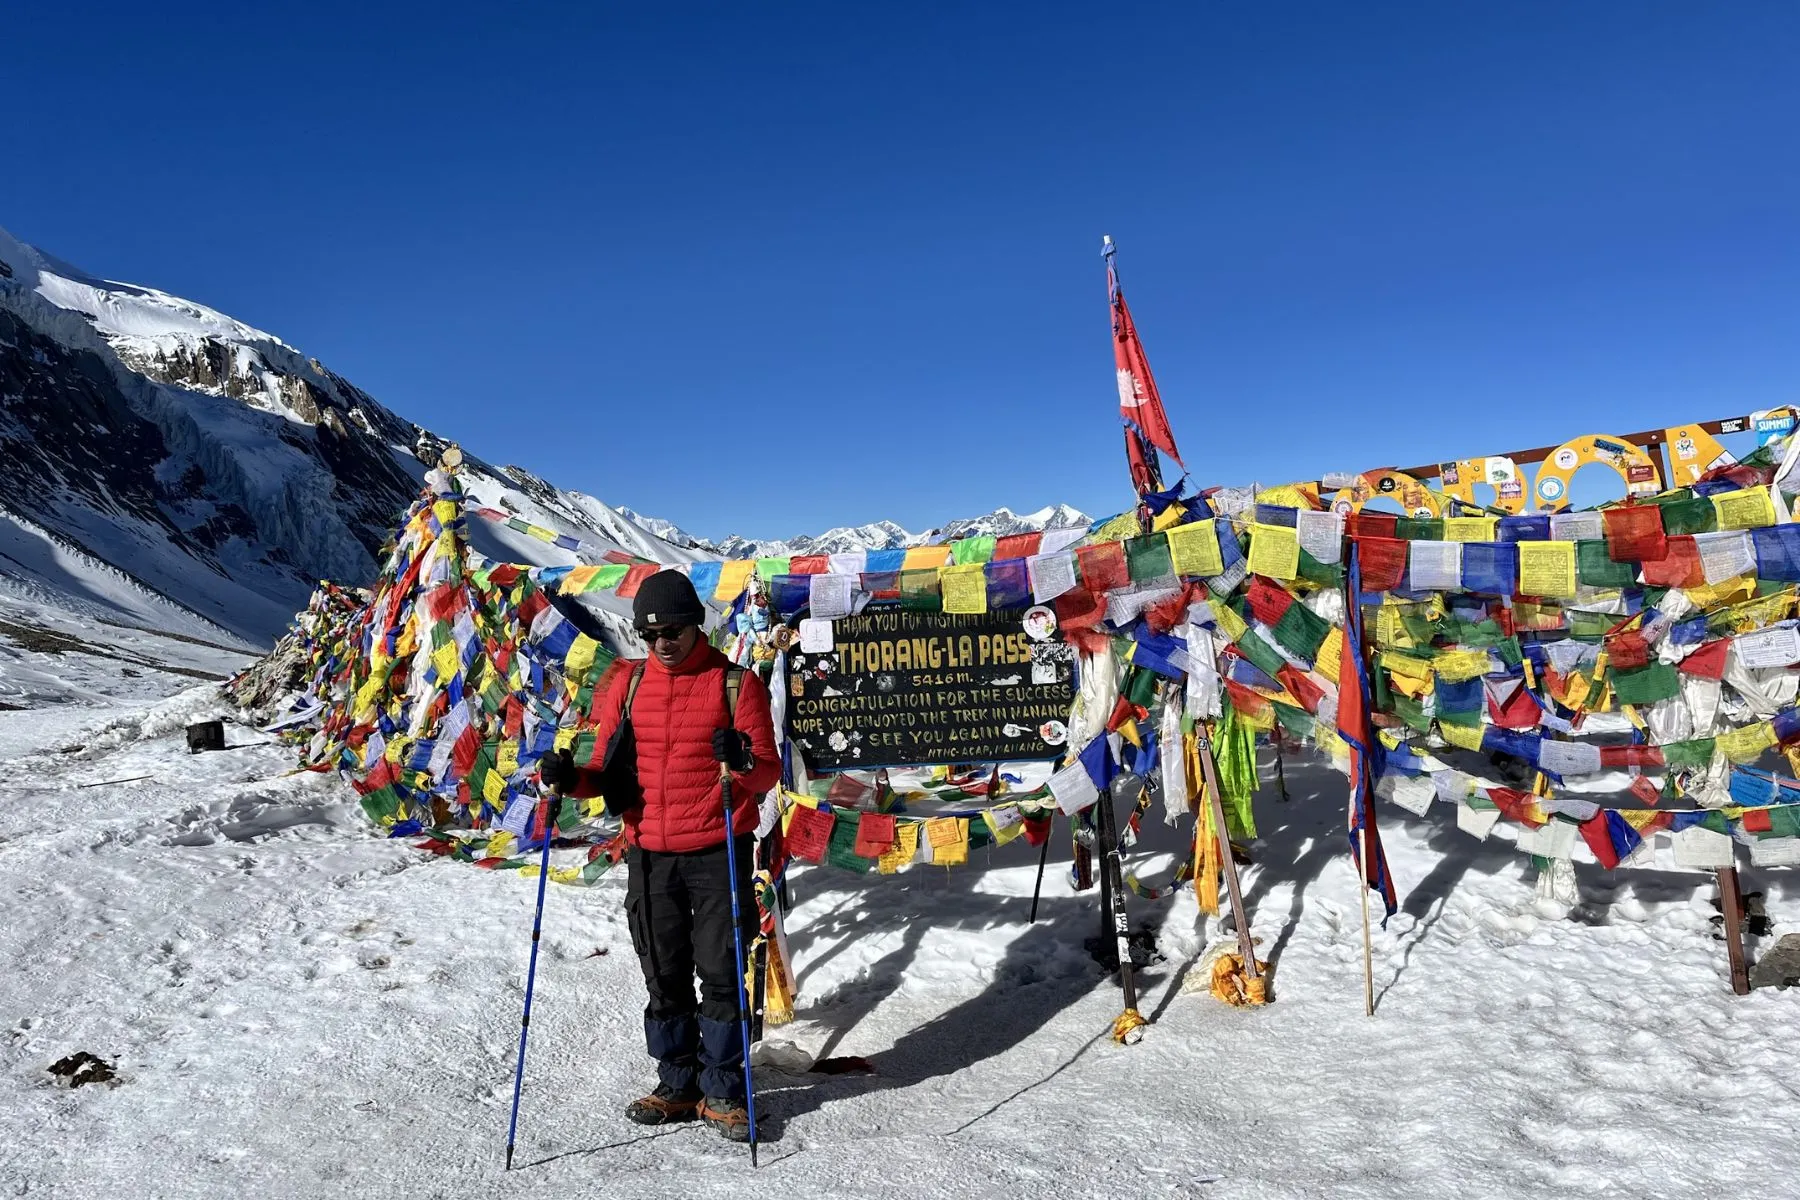
Crossing Thorong La Pass (5,416 m) was the most physically demanding day of the entire trek. I again started walking at around 4:00 a.m., headlamp on, moving slowly into the darkness. Early starts are critical here. Not only for safety, but also because weather conditions tend to be calmer and visibility clearer in the early morning.
The ascent toward the pass was long, cold, and relentless. The thin air made even gentle inclines feel steep, and progress was measured in slow, controlled steps. Pauses were frequent, both to catch breath and to manage body temperature in the freezing air. As the morning progressed, wind strength increased noticeably, reinforcing why starting late can significantly increase exposure to strong winds and harsher conditions.
Along the route to Thorong La, there is a tea house partway up the ascent, and another directly at the pass itself. These stops provide hot drinks, offering brief opportunities to warm up before continuing. Again, having cash ready made these short stops smoother and faster, which mattered in cold, windy conditions.
Reaching the prayer flags at the top of Thorong La was a moment of relief rather than celebration. The altitude, cold, and fatigue were intense, and lingering at the pass was not advisable. The descent toward Muktinath brought a gradual return of oxygen, warmth, and a clear sense of transition. From exposed high-alpine terrain back toward more sheltered landscapes.
Practical Tip: Timing and Preparation Matter
Both Tilicho Lake and Thorong La Pass reinforced a few key lessons:
- Start early for clearer weather and better visibility
- Late starts often mean stronger winds and colder conditions
- Carry enough cash, preferably in small denominations
- Pace yourself and prioritize safety over speed
These high-altitude highlights were not about comfort or ease. They were about preparation, patience, and making steady, cautious decisions in environments where small mistakes can have serious consequences.
Rough Budget Breakdown (NPR)
Trekking the Annapurna Circuit, even partially, it involves a mix of predictable costs and variable day-to-day expenses. While permit fees and transportation are relatively fixed, daily spending depends heavily on altitude, weather, appetite, and how long you stay in each location. Prices generally increase as you gain elevation, reflecting the difficulty of transporting supplies to remote areas.
The budget below reflects my actual spending as a solo trekker, excluding international flights and personal shopping. Costs include accommodation, meals, hot drinks, and basic daily necessities.
| Item | Cost (NPR) |
|---|---|
| Bus Pokhara → Besisahar | 600 |
| Jeep share to Chame | 2,500 |
| Spending in Chame | 1,750 |
| Spending in Manang (2 nights) | ~3,000 |
| Spending in Tilicho Base Camp | 3,850 |
| Spending in Yak Kharka | 2,500 |
| Spending in Thorong Phedi | 3,000 |
| Spending in Muktinath | 2,500 |
| Van Muktinath → Pokhara | 1,800 |
Estimated total: ~22,500–24,000 NPR
A few observations based on this breakdown:
- Transportation costs are relatively affordable when shared. Talking to other trekkers and negotiating on the spot significantly reduced expenses, particularly for the jeep from Besisahar to Chame.
- Accommodation costs are often bundled with food, especially at higher elevations, where staying at a lodge usually implies eating meals there. While rooms themselves may be inexpensive, food and hot drinks become the primary expense.
- Spending increases with altitude. Places like Tilicho Base Camp and Thorong Phedi were noticeably more expensive than Chame or Manang due to limited access and harsher conditions.
- Hot drinks add up, especially in cold environments. Tea, coffee, and hot water were essential for warmth and hydration, particularly during early starts.
- Flexibility affects cost. Longer stays for acclimatization or weather delays naturally increase daily expenses, but they are often a worthwhile trade-off for safety.
Overall, this budget reflects a realistic cost for a self-guided, tea-house-based trek in the Annapurna region. With careful planning, reasonable pacing, and shared transport where possible, it is possible to manage costs without compromising safety or essential comfort.
Final Thoughts
I often came across the argument that an Annapurna Circuit trek is considered “unfinished” if it doesn’t follow the full traditional route from start to end. Starting in Chame and finishing in Muktinath, for example, is sometimes seen as incomplete.
In reality, not everyone has the same amount of time, resources, or physical capacity. Every trek is shaped by personal circumstances.
For me, the value of this journey was never about ticking off the entire circuit. What mattered was moving through the mountains safely, making thoughtful decisions along the way, and coming away with lasting impressions of the landscape and the experience itself.
In the end, returning safely with meaningful memories and lessons learned is what truly counts.